Creating custom apparel starts with a great design—and thanks to tools like Canva, even non-designers can bring their ideas to life. Whether you’re making a new logo or mocking up T-shirts for your brand, Canva makes design accessible, fast, and beginner-friendly.
At Level Up Print, we work with tons of customers who use Canva to create logos, shirts, stickers, business cards, and more. But to make sure your final product looks just as clean in real life as it does on your screen, there are a few key tips you should know—plus one super important step at the end: sharing your Canva file with us properly.
Let’s break it down:
🎨 Why Use Canva for Apparel Mockups and Logo Design?
1. It’s Simple and User-Friendly
Canva’s drag-and-drop interface is intuitive, even for total beginners. No Adobe experience required.
2. Tons of Free Templates
Search “T-shirt design” or “logo” and you’ll find hundreds of starting points. Customize fonts, icons, and colors with ease.
3. Mockups Help You Visualize Before You Print
Canva lets you place your designs on realistic mockups—like shirts, hoodies, or tote bags—so you know exactly what to expect.
4. Great for Social & Branding Cohesion
Design once, and resize or repurpose it across your Instagram, website, email headers, and more.
🧢 How to Design Custom Apparel in Canva
- Choose a custom canvas size – We recommend starting with 12″ x 12″ at 300 DPI (3600px x 3600px) for T-shirt graphics.
- Use bold fonts and high-contrast colors – These print best and stay legible from a distance.
- Avoid tiny details or thin lines – They don’t always transfer well in screen printing or embroidery.
- Upload your logo or create one in Canva using their “Logo” templates.
🖼 How to Make a Logo in Canva
- Start with the “Logo” template under “Create a Design.”
- Choose a bold, simple layout with minimal text.
- Use no more than 2 fonts and 2–3 colors for clean visibility.
- Make sure your text is converted to outlines if possible before downloading (or leave it editable and share access with us).
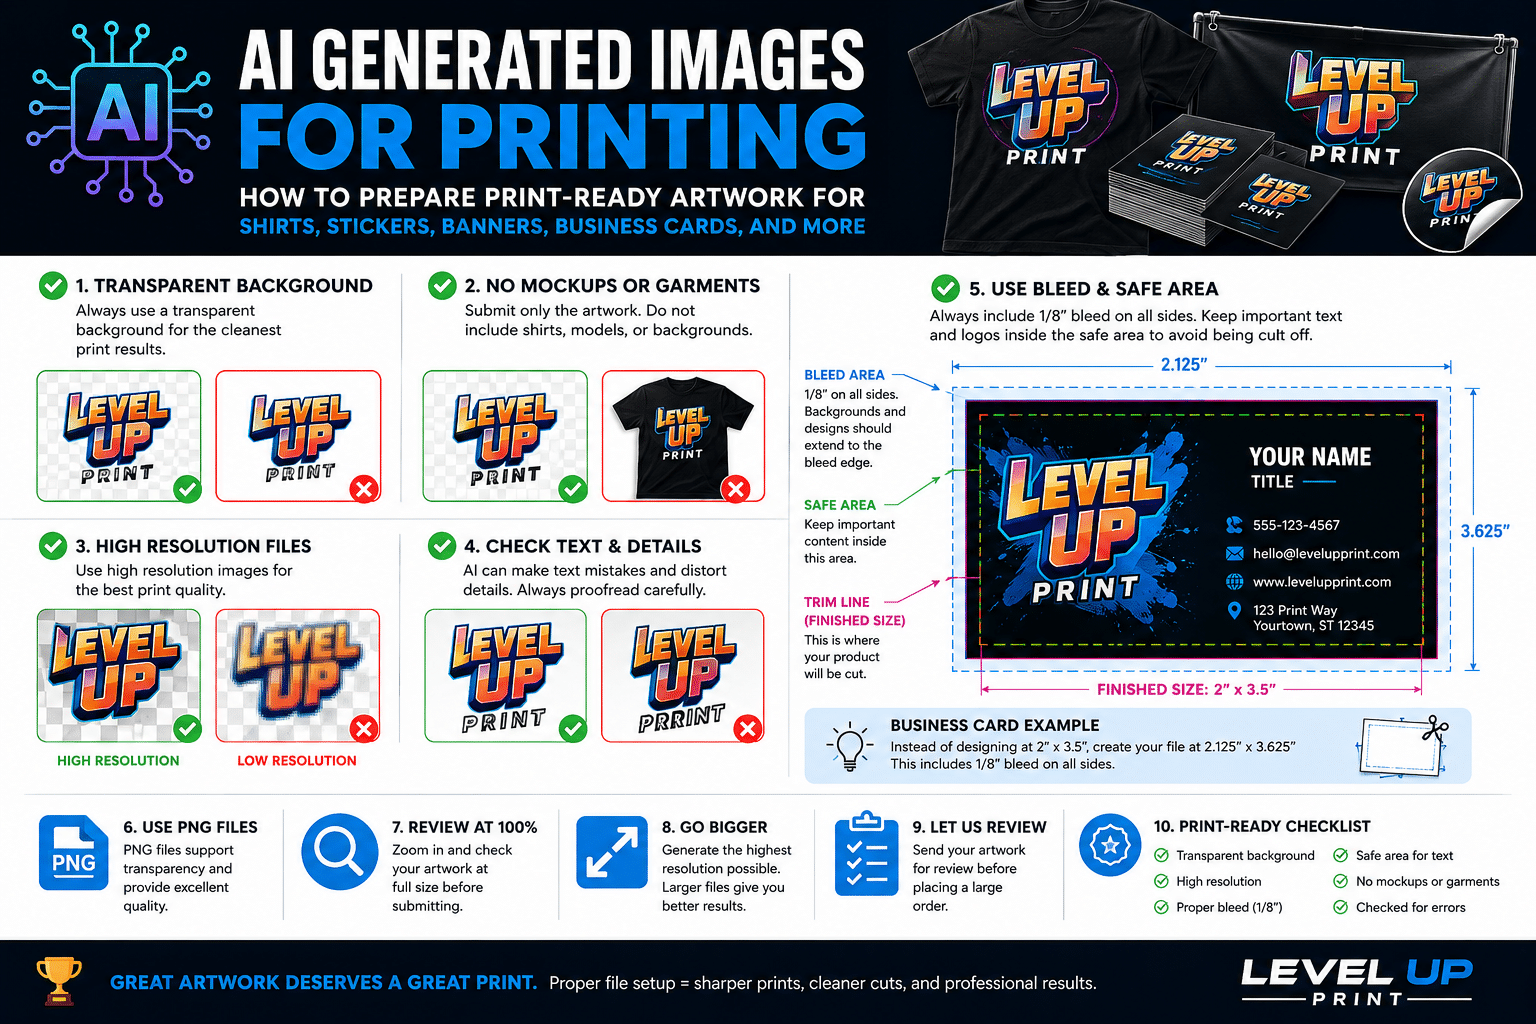
- Export in vector format (SVG) or at high-resolution PNG with transparent background.
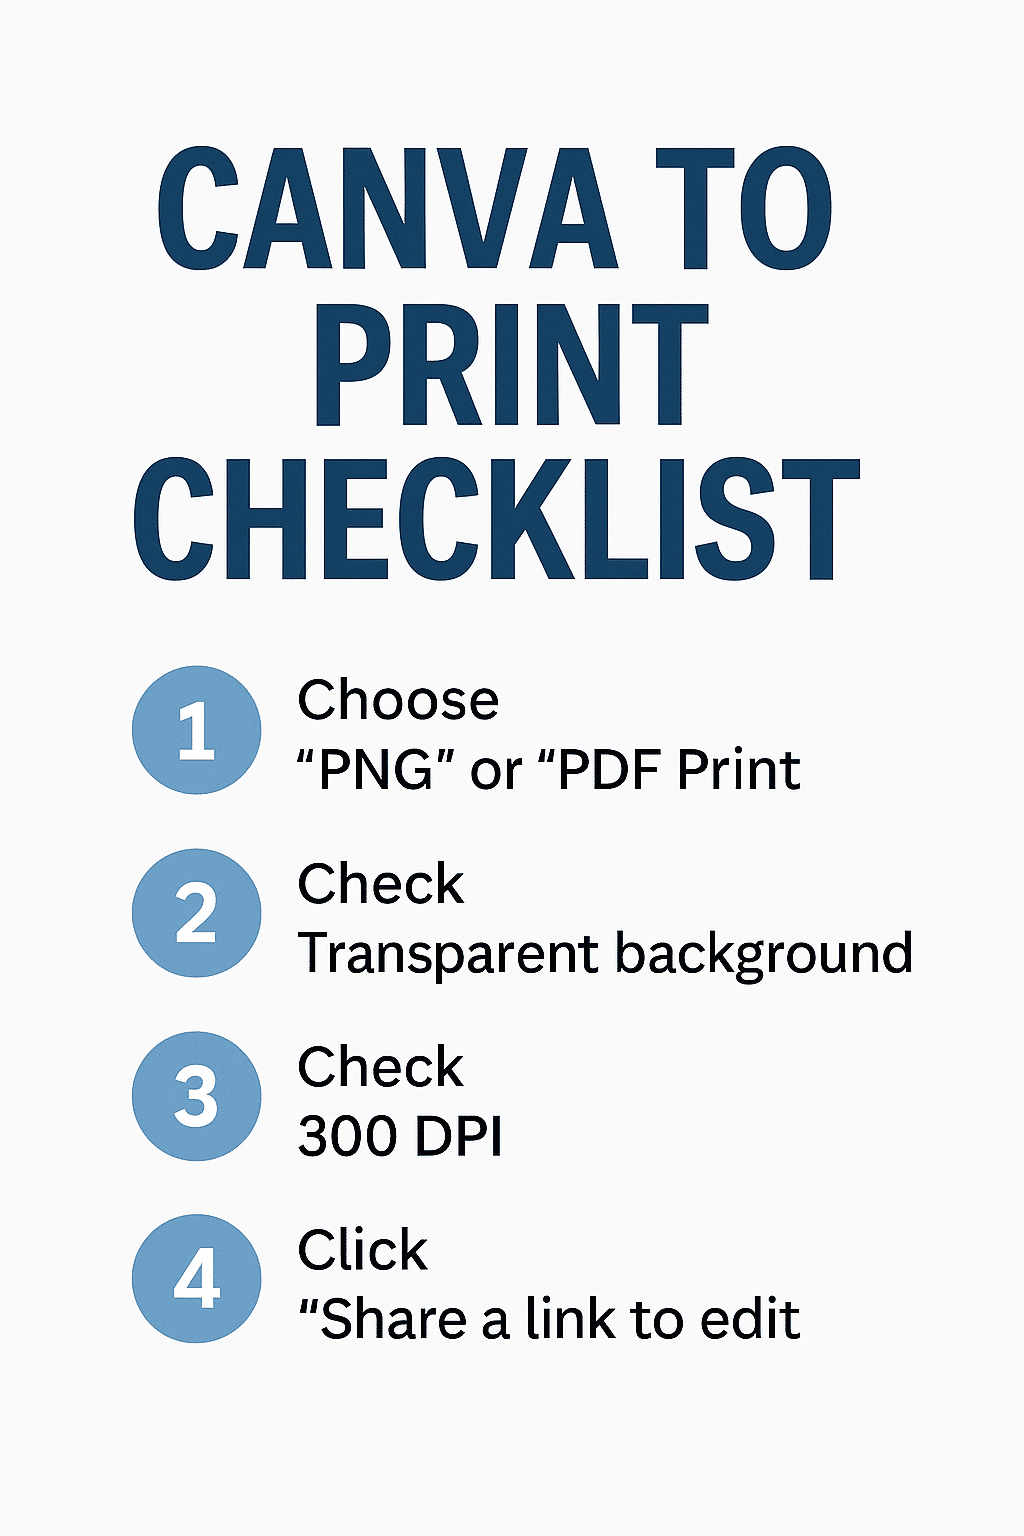
✅ Downloading Files for Print (the Right Way)
When your design is ready, download using these settings:
- PNG or PDF Print for flat designs
- SVG for logos (for screen printing or embroidery)
- Transparent background (especially for shirts and decals)
- 300 DPI or the highest quality Canva allows
BUT HERE’S THE THING:
Canva sometimes compresses images or flattens files during download—especially if fonts or layers are involved.
🔗 Pro Tip: Share Your Canva Design With Us Directly
The best way to avoid resolution issues or font mismatches? Share your Canva project link with us!
Here’s how:
- Click the “Share” button in the top-right of your Canva project.
- Select “Share a link to edit” or “Share a link to use as a template.”
- Paste that link into your order notes or email it to us.
This lets our design team:
- Download the file in full resolution
- Fix anything that might not print well
- Keep fonts, layers, and layout exactly how you intended
💬 Final Thoughts
Canva is one of the best tools for small business owners, creators, and anyone building their brand on a budget. Whether you’re launching a new product line, creating uniforms, or just designing your first logo—you can absolutely start in Canva.
Just remember: before you print, make sure your files are set up right—or let us help. Sharing your editable Canva link ensures your design comes through exactly how you envision it.
Need help cleaning up a Canva design or turning your idea into a real product? Level Up Print is here to make it happen—quickly and professionally.